Hadoop Study Notes - 1
Hadoop Study Notes - 1 Setting Up a Hadoop Cluster
What Is Hadoop
All massive amounts of data must go through the process of: first storing the data, then retrieving it for computation, and finally obtaining results. But if we only use databases like MySQL to store this massive data and then run SQL statements for statistics, it will very likely freeze directly because the data volume is too large. Hadoop is a set of tools specifically designed for big data processing, composed internally of multiple components. You can think of it as a middle layer between applications and big data.
Previously, we only needed to read and write data from a single server, but a single server’s storage is limited — it’s impossible to store all data on one server. Therefore, we need to read and write data across multiple servers; but it’s also impossible for each server to hold only a single file, since opening and reading such huge files would be painful. So we can split large files into small data blocks (called block), which makes both reading/writing and backup/processing convenient; these servers that store the data are called datanode.
This distributed software responsible for splitting and storing data is HDFS (full name Hadoop Distributed File System), i.e., Hadoop’s distributed file system.
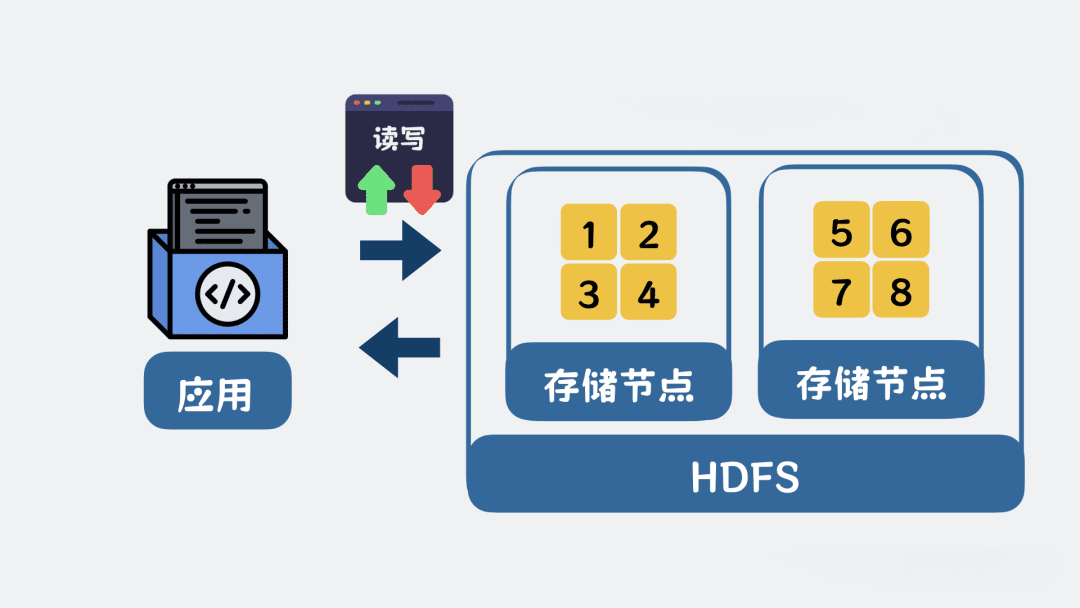
HDFS
Now that we’ve handled how to store data, next we should choose how to process data efficiently. Hadoop’s MapReduce is the core for processing data; it likewise splits the data into multiple small pieces (split) and hands these pieces to different nodes for processing (Map), and finally aggregates the processing results (Reduce).
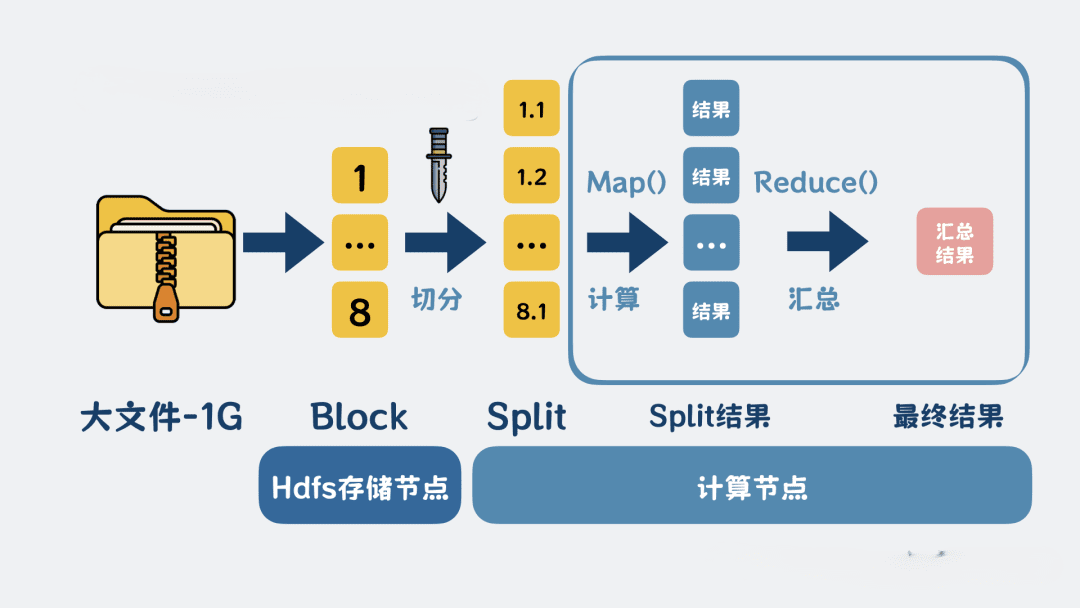
MapReduce
Now there’s a new problem: how does MapReduce assign data tasks to different machines for processing? YARN (Yet Another Resource Negotiator) is the scheduler responsible for uniformly scheduling computing resources. YARN abstracts the tasks to be computed into “containers”, and then allocates tasks to individual computers for execution through “resource request + coordinated scheduling”.
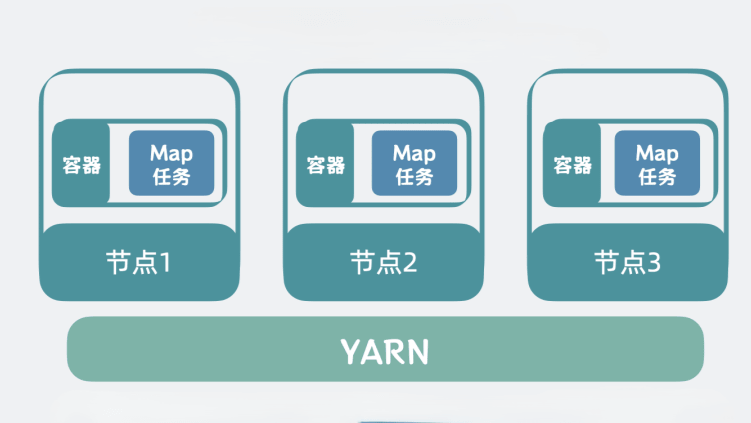
YARN
Hive is a middle layer between SQL and MapReduce; it can convert SQL-like statements into map and reduce tasks, reducing the workload of writing map() and reduce() code.
MapReduce caches intermediate computation results on the hard disk to reduce computing resource consumption, but caching results on the hard disk brings multiple read/write overheads. Therefore, Spark preferentially caches intermediate computation results in memory to optimize performance. At the same time, Spark can let Hive also use Spark through the Hive on Spark middle layer.
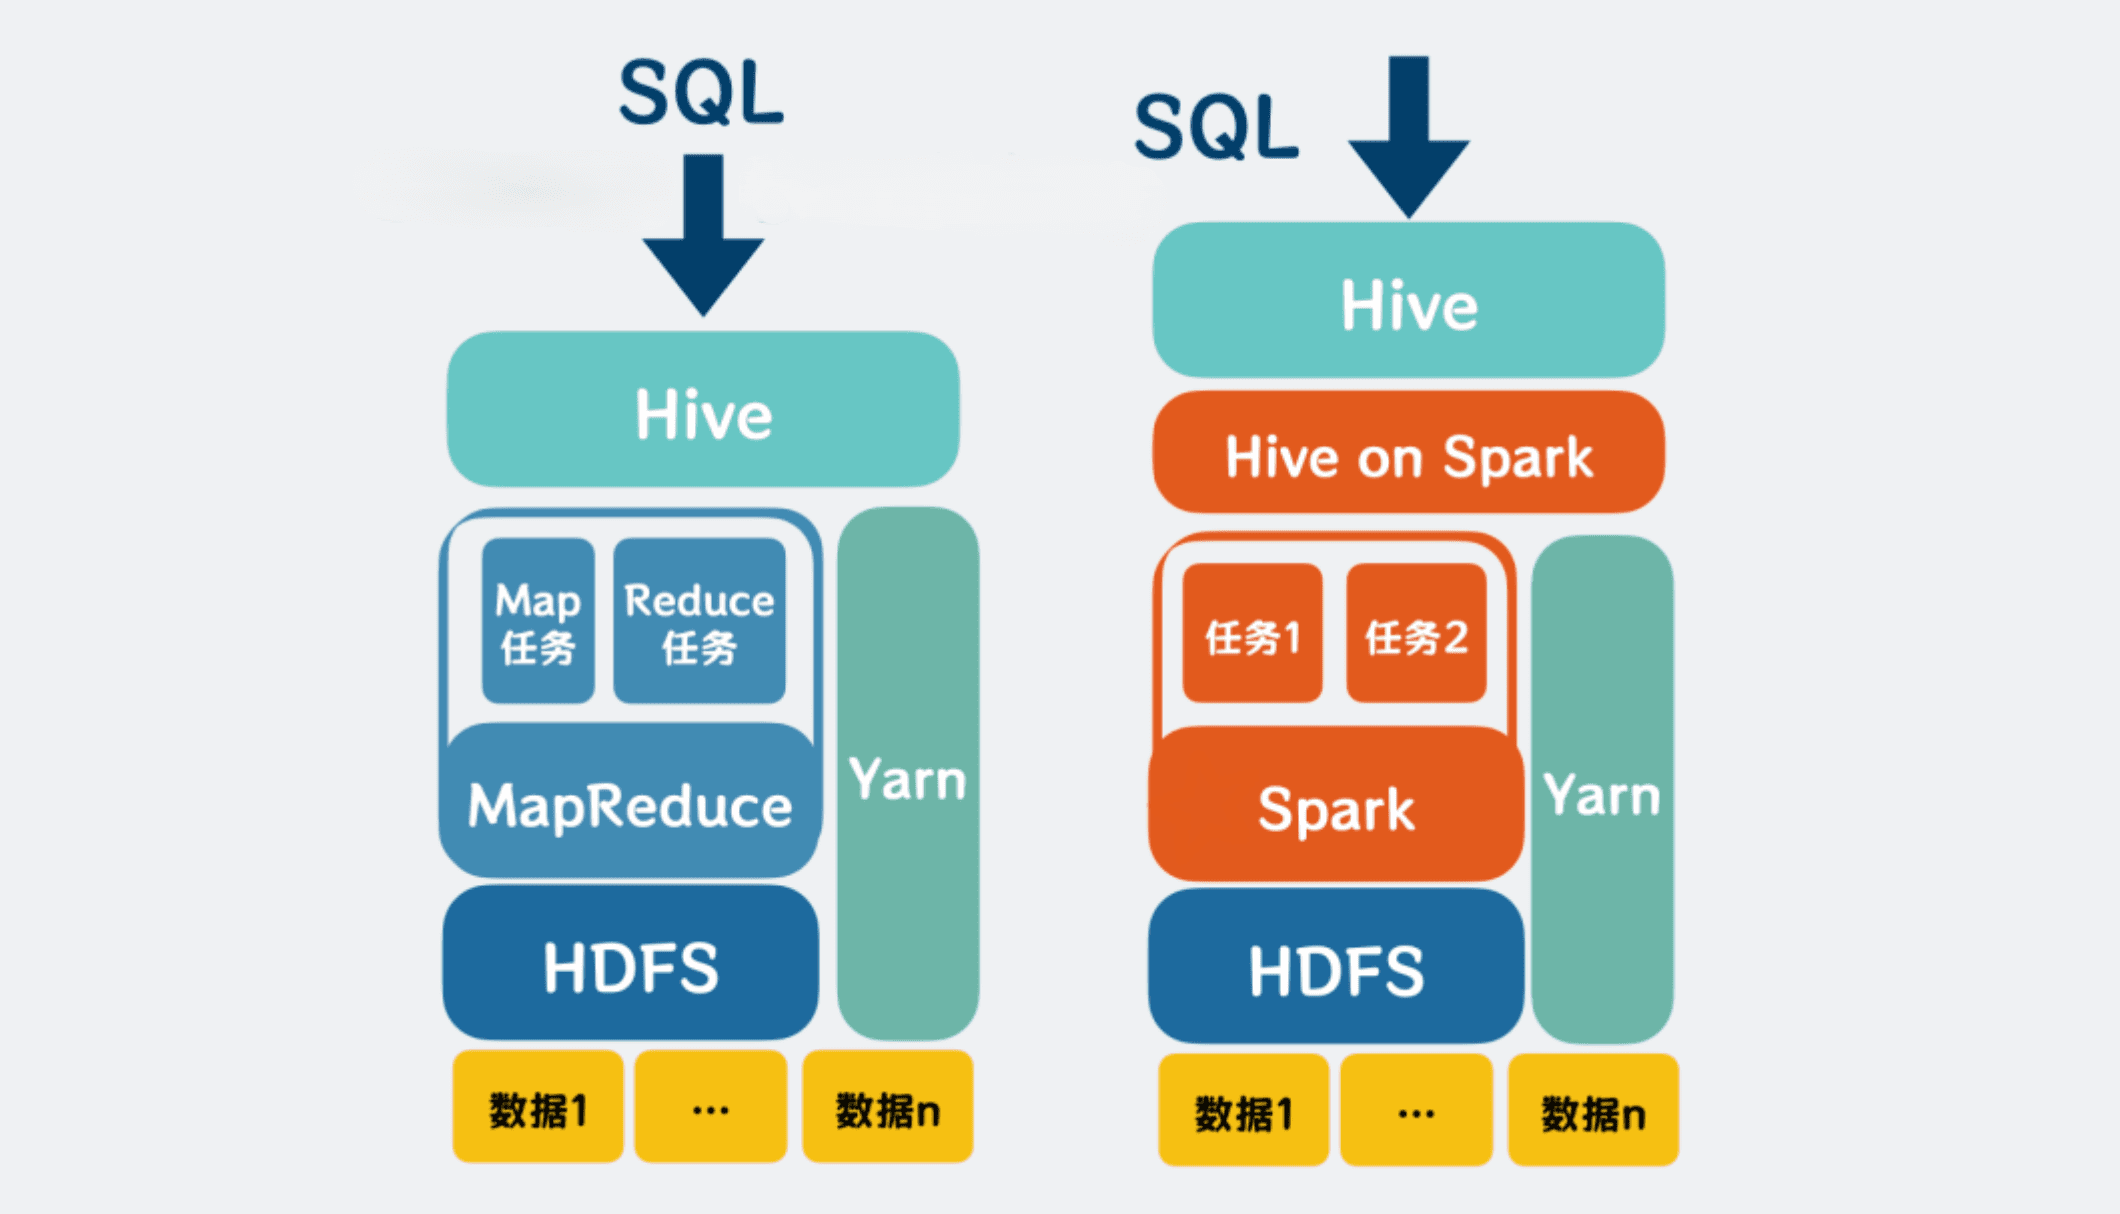
Hive (left) Spark (right)
Because Hive on Spark incurs performance overhead, Spark SQL was introduced to directly replace Hive.
At this point, offline data (batch processing data) can already be processed normally. If you need to process real-time online data (process one as it comes), you can use Flink (minute-level) and Hbase (millisecond-level).
Hands-on Installation
In this section, we will install Hadoop and configure the three server nodes with different functions as shown in the figure below.

Three servers with different functions
Preparation
Here we use VMware and Ubuntu virtual machines for the following preparations. Please complete the download and installation of each software yourself: vmware↗, Ubuntu Tsinghua mirror↗.
After installation, add a virtual machine CD-ROM to VMware using the classic configuration. Note here that for the first installation, allocate more memory to prevent the installation from hanging (you can reduce it afterward).
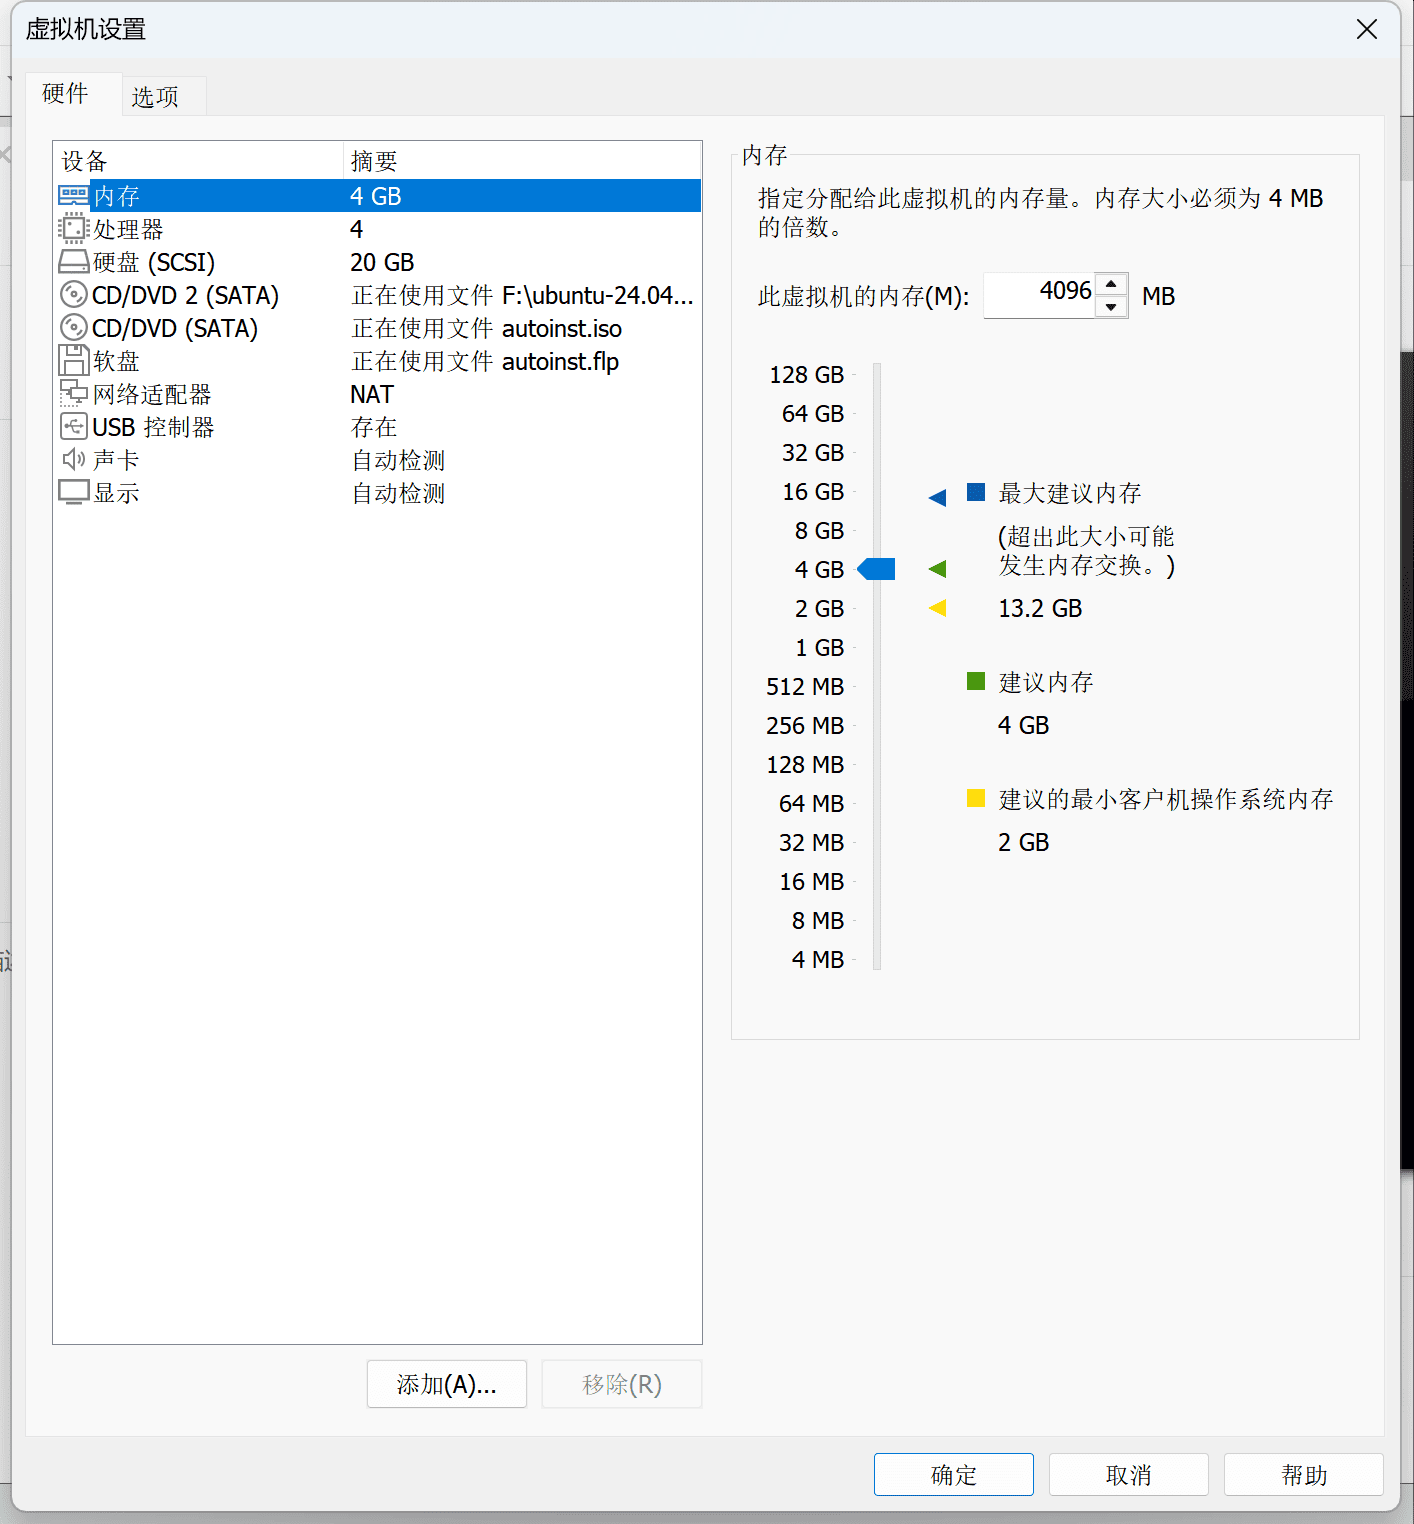
Possible virtual machine configuration
After configuration, enter the virtual machine and install Ubuntu — this is also straightforward. After installation, right-click to open the command line and try to obtain root privileges, and try to install Java (do NOT use his command!!!).
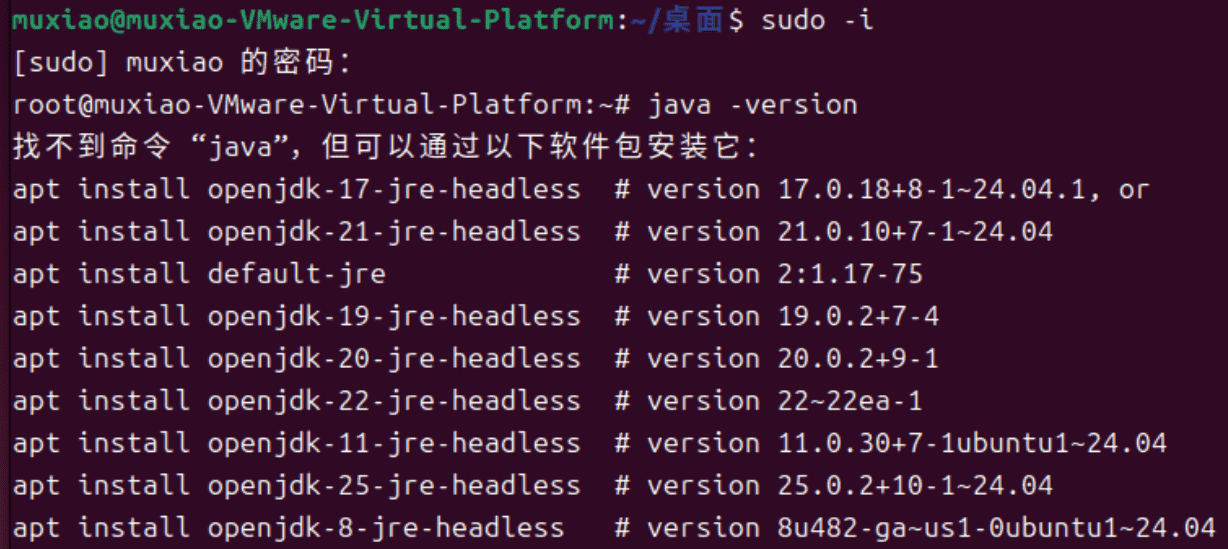
Command 1
But but but!!!! Don’t be fooled here — use the command apt-get install openjdk-8-jdk to install the JDK. Using his will leave you without jps, which is needed later.
Enter the command
sudo -iorsudo -s, then enter your user password. Both commands will start a new shell session as the root user. The-ioption simulates a full root login, while the-soption simply starts a shell as root.
Also, adding
sudodirectly before a command lets you execute it as the root user.
Connecting to the Virtual Machine with Xshell
Next, use Xshell to connect to the virtual machine. Download Xshell↗.
Start the virtual machine, first use the command sudo apt install net-tools to install net-tools, and enter the ifconfig command to view the IP address (not ipconfig).
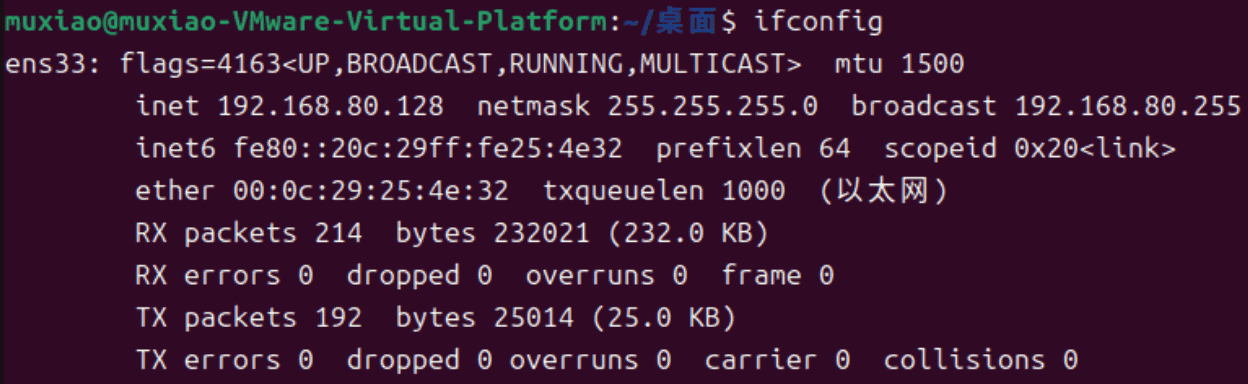
ifconfig
At the same time, use the command sudo apt install openssh-server to install openssh-server so as to start the SSH service.
Next, configure Xshell: enter the IP address obtained above, and remember to enter the Ubuntu account and password in the user authentication.
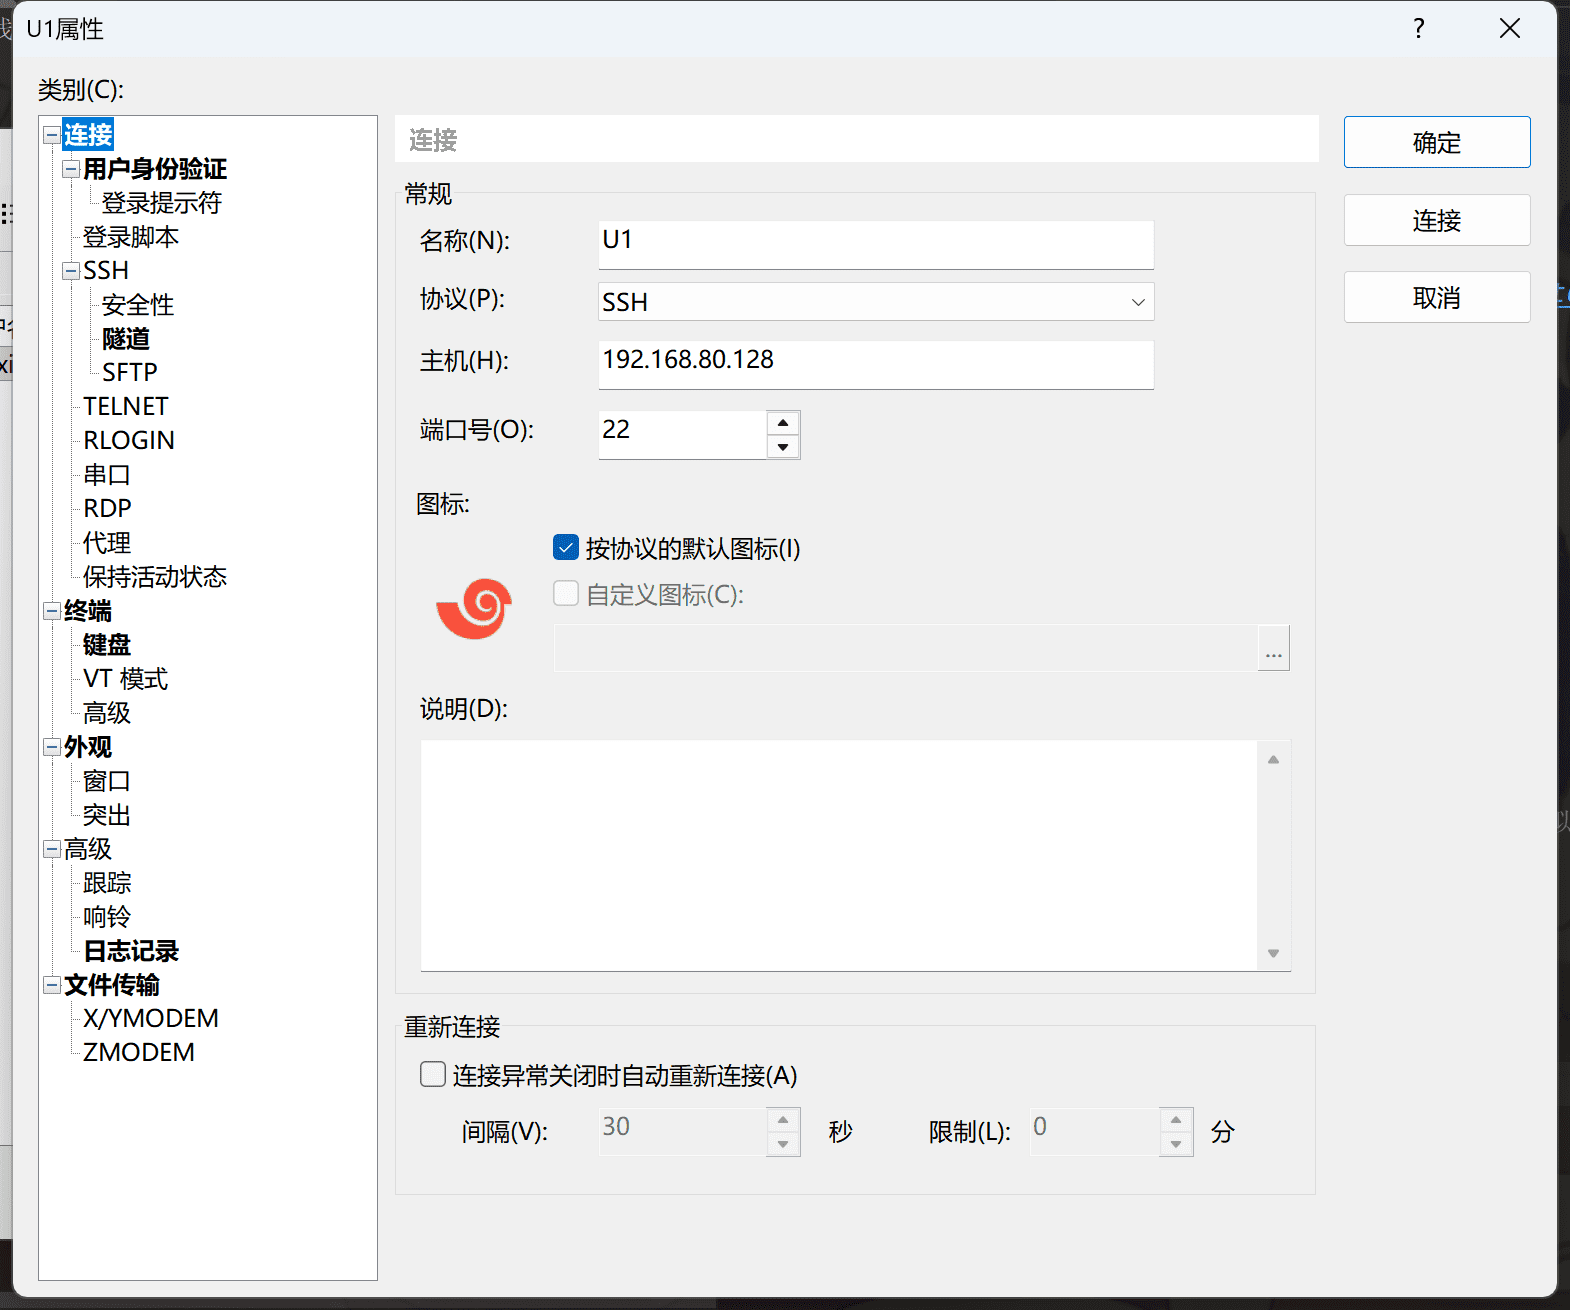
Xshell configuration
Click connect.
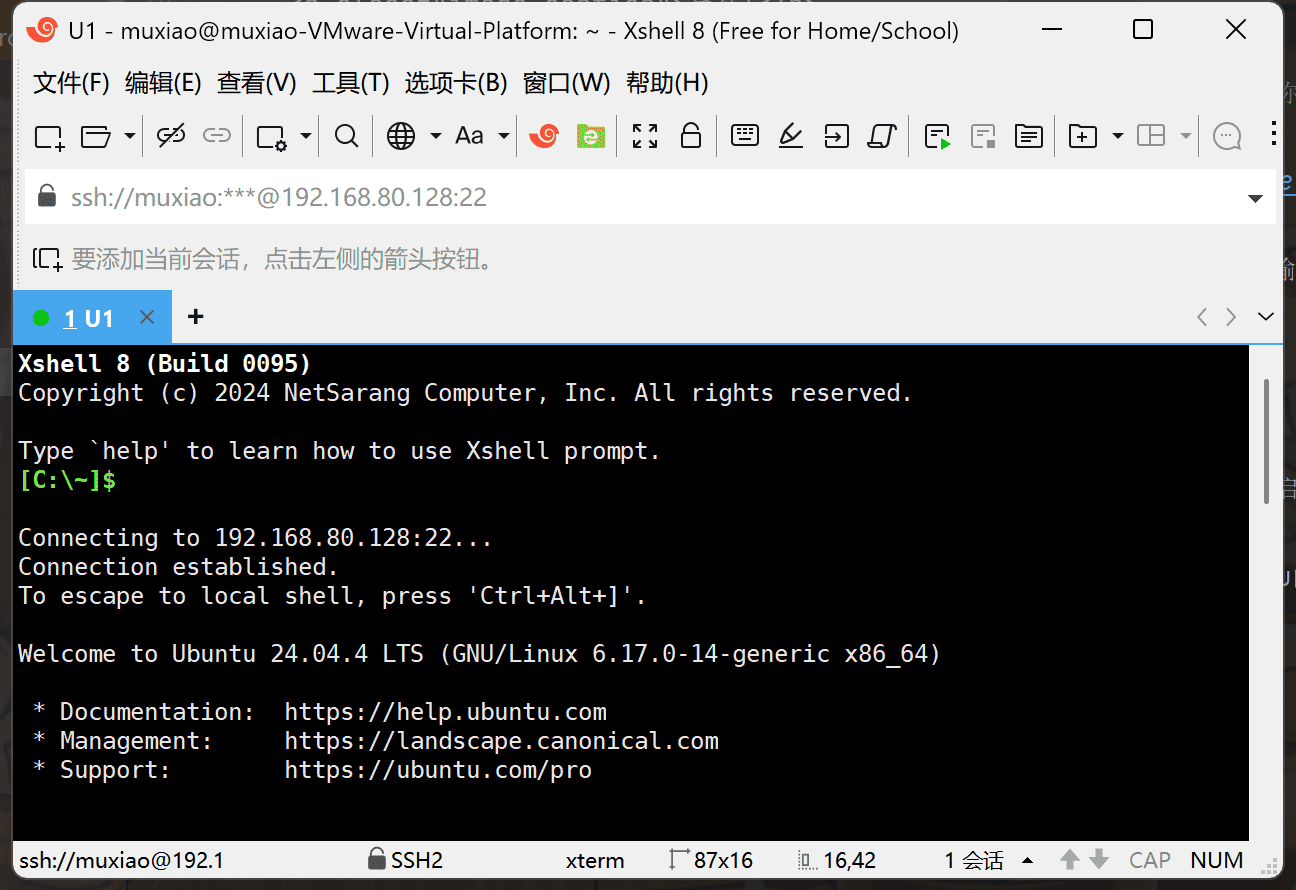
Xshell connection successful
From now on, just operate in Xshell, which makes copy-paste convenient.
Using the root account, enter nano /etc/default/useradd and change SHELL=/bin/sh in the file to SHELL=/bin/bash to modify the default shell to bash when creating users.
tips: In nano, press Ctrl+O and hit Enter to save, press Ctrl+X to exit.
Configuring Hadoop
Go to the Hadoop Tsinghua mirror↗ to download Hadoop and drag it directly into the virtual machine (you may need apt install lrzsz). After the transfer is complete, you can use the ll command to list files.
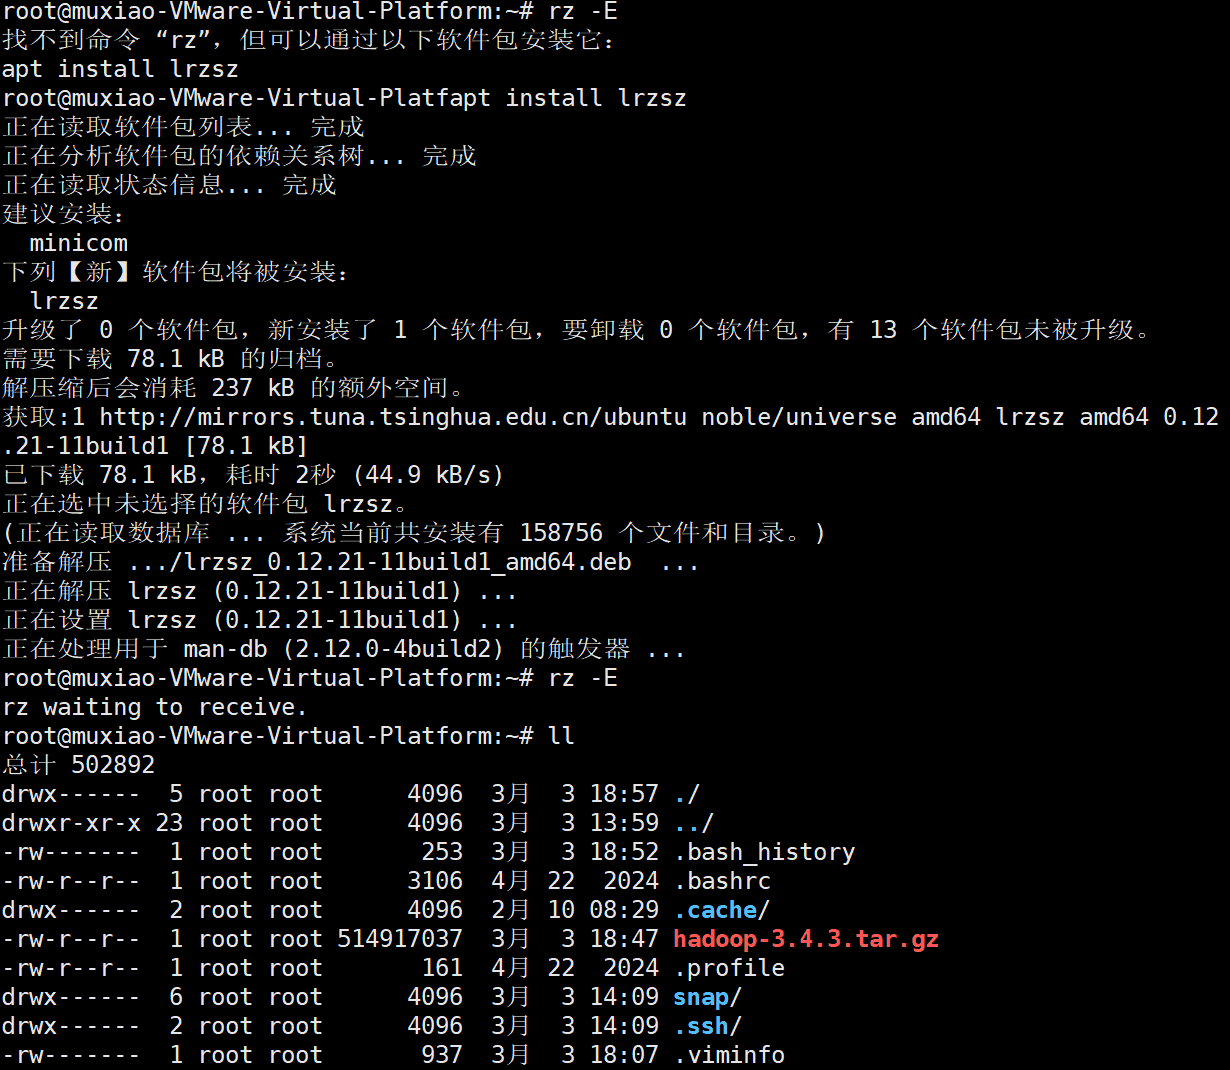
Hadoop download
Use tar -zxf hadoop-3.4.3.tar.gz -C /usr/local to extract the file. After extraction, you can use cd /usr/local/hadoop-3.4.3 to enter the extracted folder. First, create a hadoop user without root privileges:
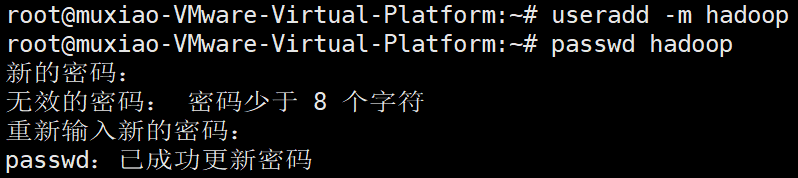
Creating hadoop user (ignore the password warning)
Now you can use su - hadoop to enter the hadoop user. Note that if the hadoop user cannot execute the sudo command, you need to switch users to use it (it has not been added to the sudo group, restricting its permissions to ensure later security).
Configuration Files
Use the command nano /usr/local/hadoop-3.4.3/etc/hadoop/hadoop-env.sh to configure environment variables, and add at the end: export JAVA_HOME="/usr/lib/jvm/java-8-openjdk-amd64" (remember to change it to your own Java path).
Use the command nano /usr/local/hadoop-3.4.3/etc/hadoop/core-site.xml to configure HDFS, and enter the following configuration inside the
<configuration> <property> <name>fs.defaultFS</name> <value>hdfs://192.168.80.128:8020</value><!--Change to the virtual machine's IP address; the port defaults to 8020--> </property> <property> <name>io.file.buffer.size</name> <value>131072</value> </property></configuration>Use the command nano /usr/local/hadoop-3.4.3/etc/hadoop/hadoop-env.sh to add environment variables (just write them at the very top):
export JAVA_HOME=/usr/lib/jvm/java-8-openjdk-amd64export HADOOP_HOME=/usr/local/hadoop-3.4.3export HADOOP_CONF_DIR=$HADOOP_HOME/etc/hadoopexport HADOOP_LOG_DIR=$HADOOP_HOME/logsUse the command nano ~/.bashrc to add environment variables (just write them at the very top):
export HADOOP_HOME=/usr/local/hadoop-3.4.3export PATH=$PATH:$HADOOP_HOME/bin:$HADOOP_HOME/sbinexport JAVA_HOME=/usr/lib/jvm/java-8-openjdk-amd64export PATH=$JAVA_HOME/bin:$PATH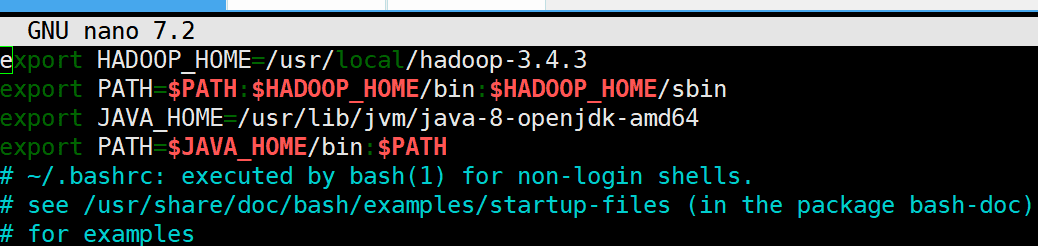
Environment variable configuration
Then you can use the command source ~/.bashrc to apply the environment variables.
Configuring the Slave Nodes
Next, use virtual machine cloning to clone two more virtual machines as slave nodes (memory can be set slightly smaller than the master node), then use ifconfig to view and obtain the two IP addresses. Also remember to use the command nano /usr/local/hadoop-3.4.3/etc/hadoop/core-site.xml to configure HDFS, and change the value under fs.defaultFS to each virtual machine’s own IP address.
On the master node, use the command nano /usr/local/hadoop-3.4.3/etc/hadoop/workers to configure the workers file, specifying the slave nodes’ IP addresses:
192.168.80.128 master node IP192.168.80.129 slave node 1192.168.80.130 slave node 2Then use the command nano /usr/local/hadoop-3.4.3/etc/hadoop/hdfs-site.xml to configure the configuration file for the three virtual machines:
<configuration> <property> <name>dfs.datanode.data.dir</name> <value>700</value><!-- Set the permission of the data directory to 700 (only the owner has read, write, and execute permissions)--> </property> <property> <name>dfs.namenode.name.dir</name> <value>/data/nn</value><!-- Directory path where the NameNode stores metadata --> </property> <property> <name>dfs.datanode.data.hosts</name> <value>192.168.80.128,192.168.80.129,192.168.80.130</value><!-- List of DataNode hosts allowed to access HDFS, specifying the IP addresses of all DataNodes in the cluster --> </property> <property> <name>dfs.blocksize</name> <value>268435456</value><!-- HDFS data block size set to 256MB (268435456 bytes); the default is 128MB --> </property> <property> <name>dfs.datanode.handle.count</name> <value>100</value><!-- Number of file handles each DataNode can open simultaneously --> </property> <property> <name>dfs.datanode.data.dir</name> <value>/data/dn</value><!-- Directory path where the DataNode stores actual data --> </property></configuration>On the master node, run sudo mkdir -p /data/dn and sudo mkdir -p /data/nn to create the namenode and datanode data directories. On the other two nodes, run sudo mkdir -p /data/dn to create the datanode data directory (slave nodes do not need to create the namenode data directory).
Setting Up SSH
Set up SSH so that the master node and slave nodes can connect via passwordless SSH. On all three nodes, enter ssh-keygen -t rsa -b 4096 and keep pressing Enter to create the RSA key pair. Then enter ssh-copy-id + IP three times (replace IP with the IP addresses of the three nodes, including itself) to distribute the keys to the other nodes.
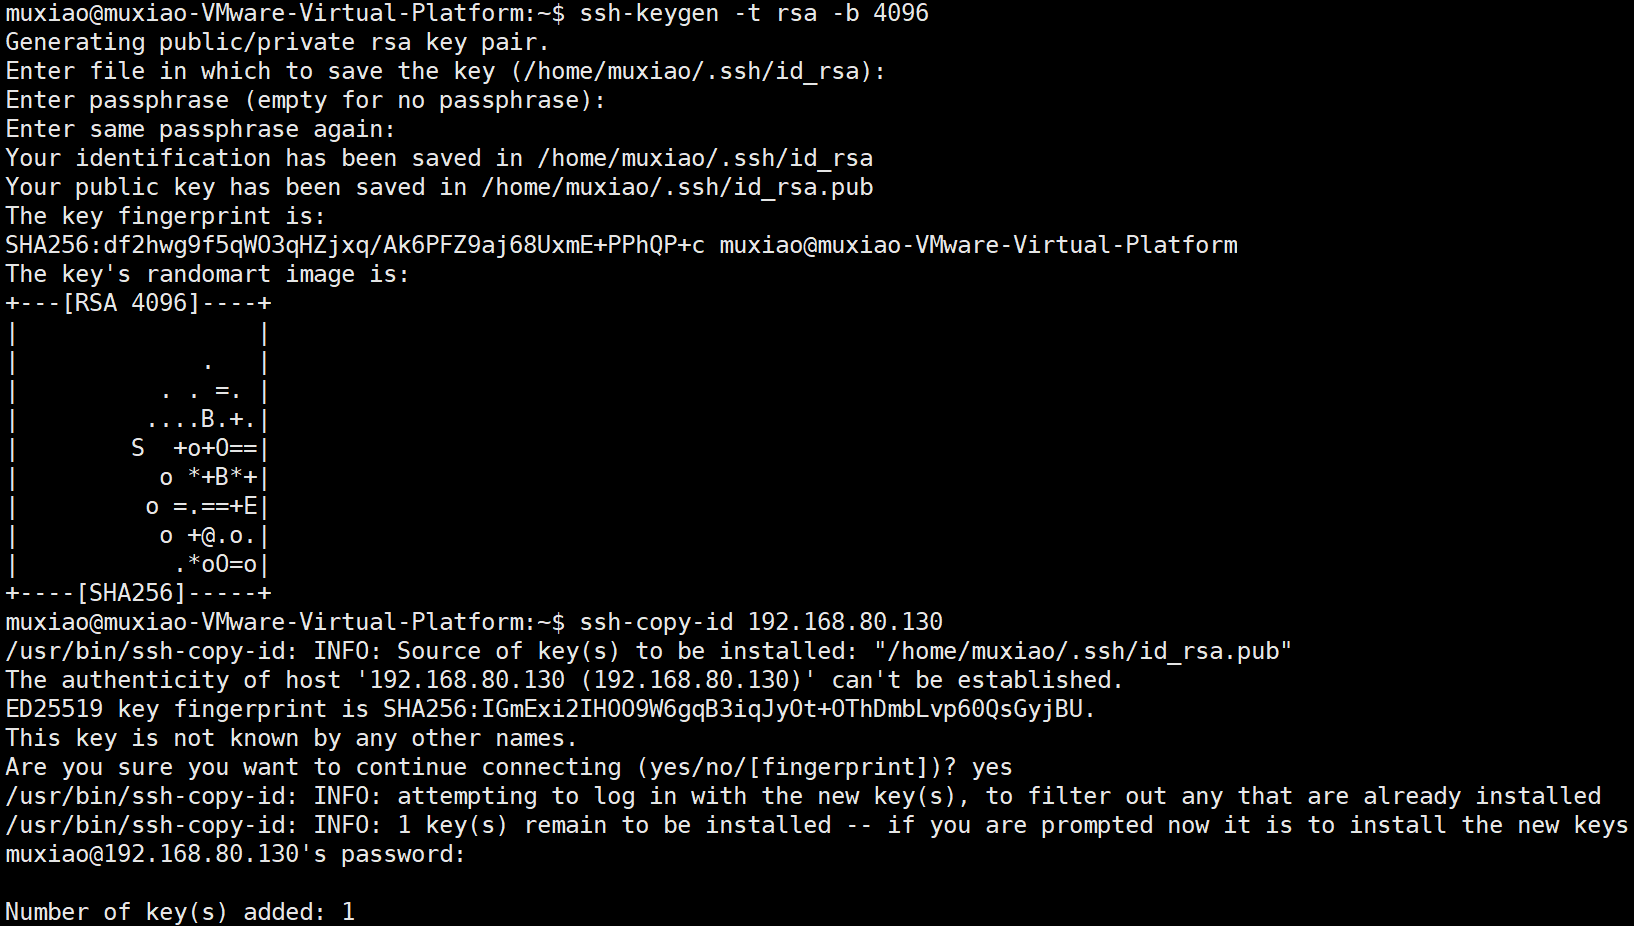
ssh configuration
Note that you should enter 4 statements on each node.
After entering them, you can try testing the connection using the command ssh followed by another node’s IP address.
tips: You can use ctrl+d to log out of the current user, i.e., exit ssh and return.
Starting Up
First, on all three nodes, use chown -R hadoop:hadoop /usr/local/hadoop-3.4.3 and chown -R hadoop:hadoop /data to change file ownership to hadoop. Now all hadoop files are owned by the hadoop user, so you need to use su - hadoop to enter the hadoop user to continue with the following operations.
Continue using /usr/local/hadoop-3.4.3/bin/hadoop namenode -format to format the namenode (hadoop namenode -format should also work if the environment variables are set up).
Next, you can use /usr/local/hadoop-3.4.3/bin/hadoop version (or hadoop version) to do a quick check of whether the configuration was successful, and on the master node use /usr/local/hadoop-3.4.3/bin/start-dfs.sh (or start-dfs.sh) to start the namenode and datanode (slave nodes will automatically start the datanode). To stop, use /usr/local/hadoop-3.4.3/bin/stop-dfs.sh (or stop-dfs.sh).
Next, use the jps command to view the status of the namenode and datanode. Under normal circumstances, the master node will show NameNode, SecondaryNameNode, and DataNode, while the slave nodes will show DataNode.
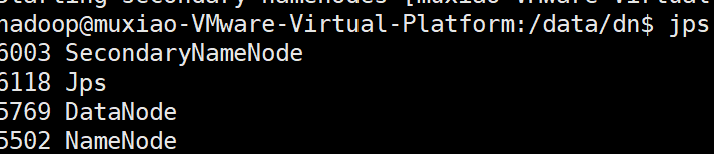
Master node jps

Slave node jps
tips: If you have already created a cluster before and run
/usr/local/hadoop-3.4.3/bin/hadoop namenode -formatto format the namenode again, and then find that the datanode/namenode is missing when running, you may need torm -rf /data/dn/*to clear the data directory and then restart. (Or use the command to back it up:mv /data/dn /data/dn.bakand then create a new empty directorymkdir -p /data/dn.)
After that, on the host machine’s browser you can use 192.168.80.128:9870 (set in fs.defaultFS, i.e., host IP plus port 9870) to test the connection to HDFS.
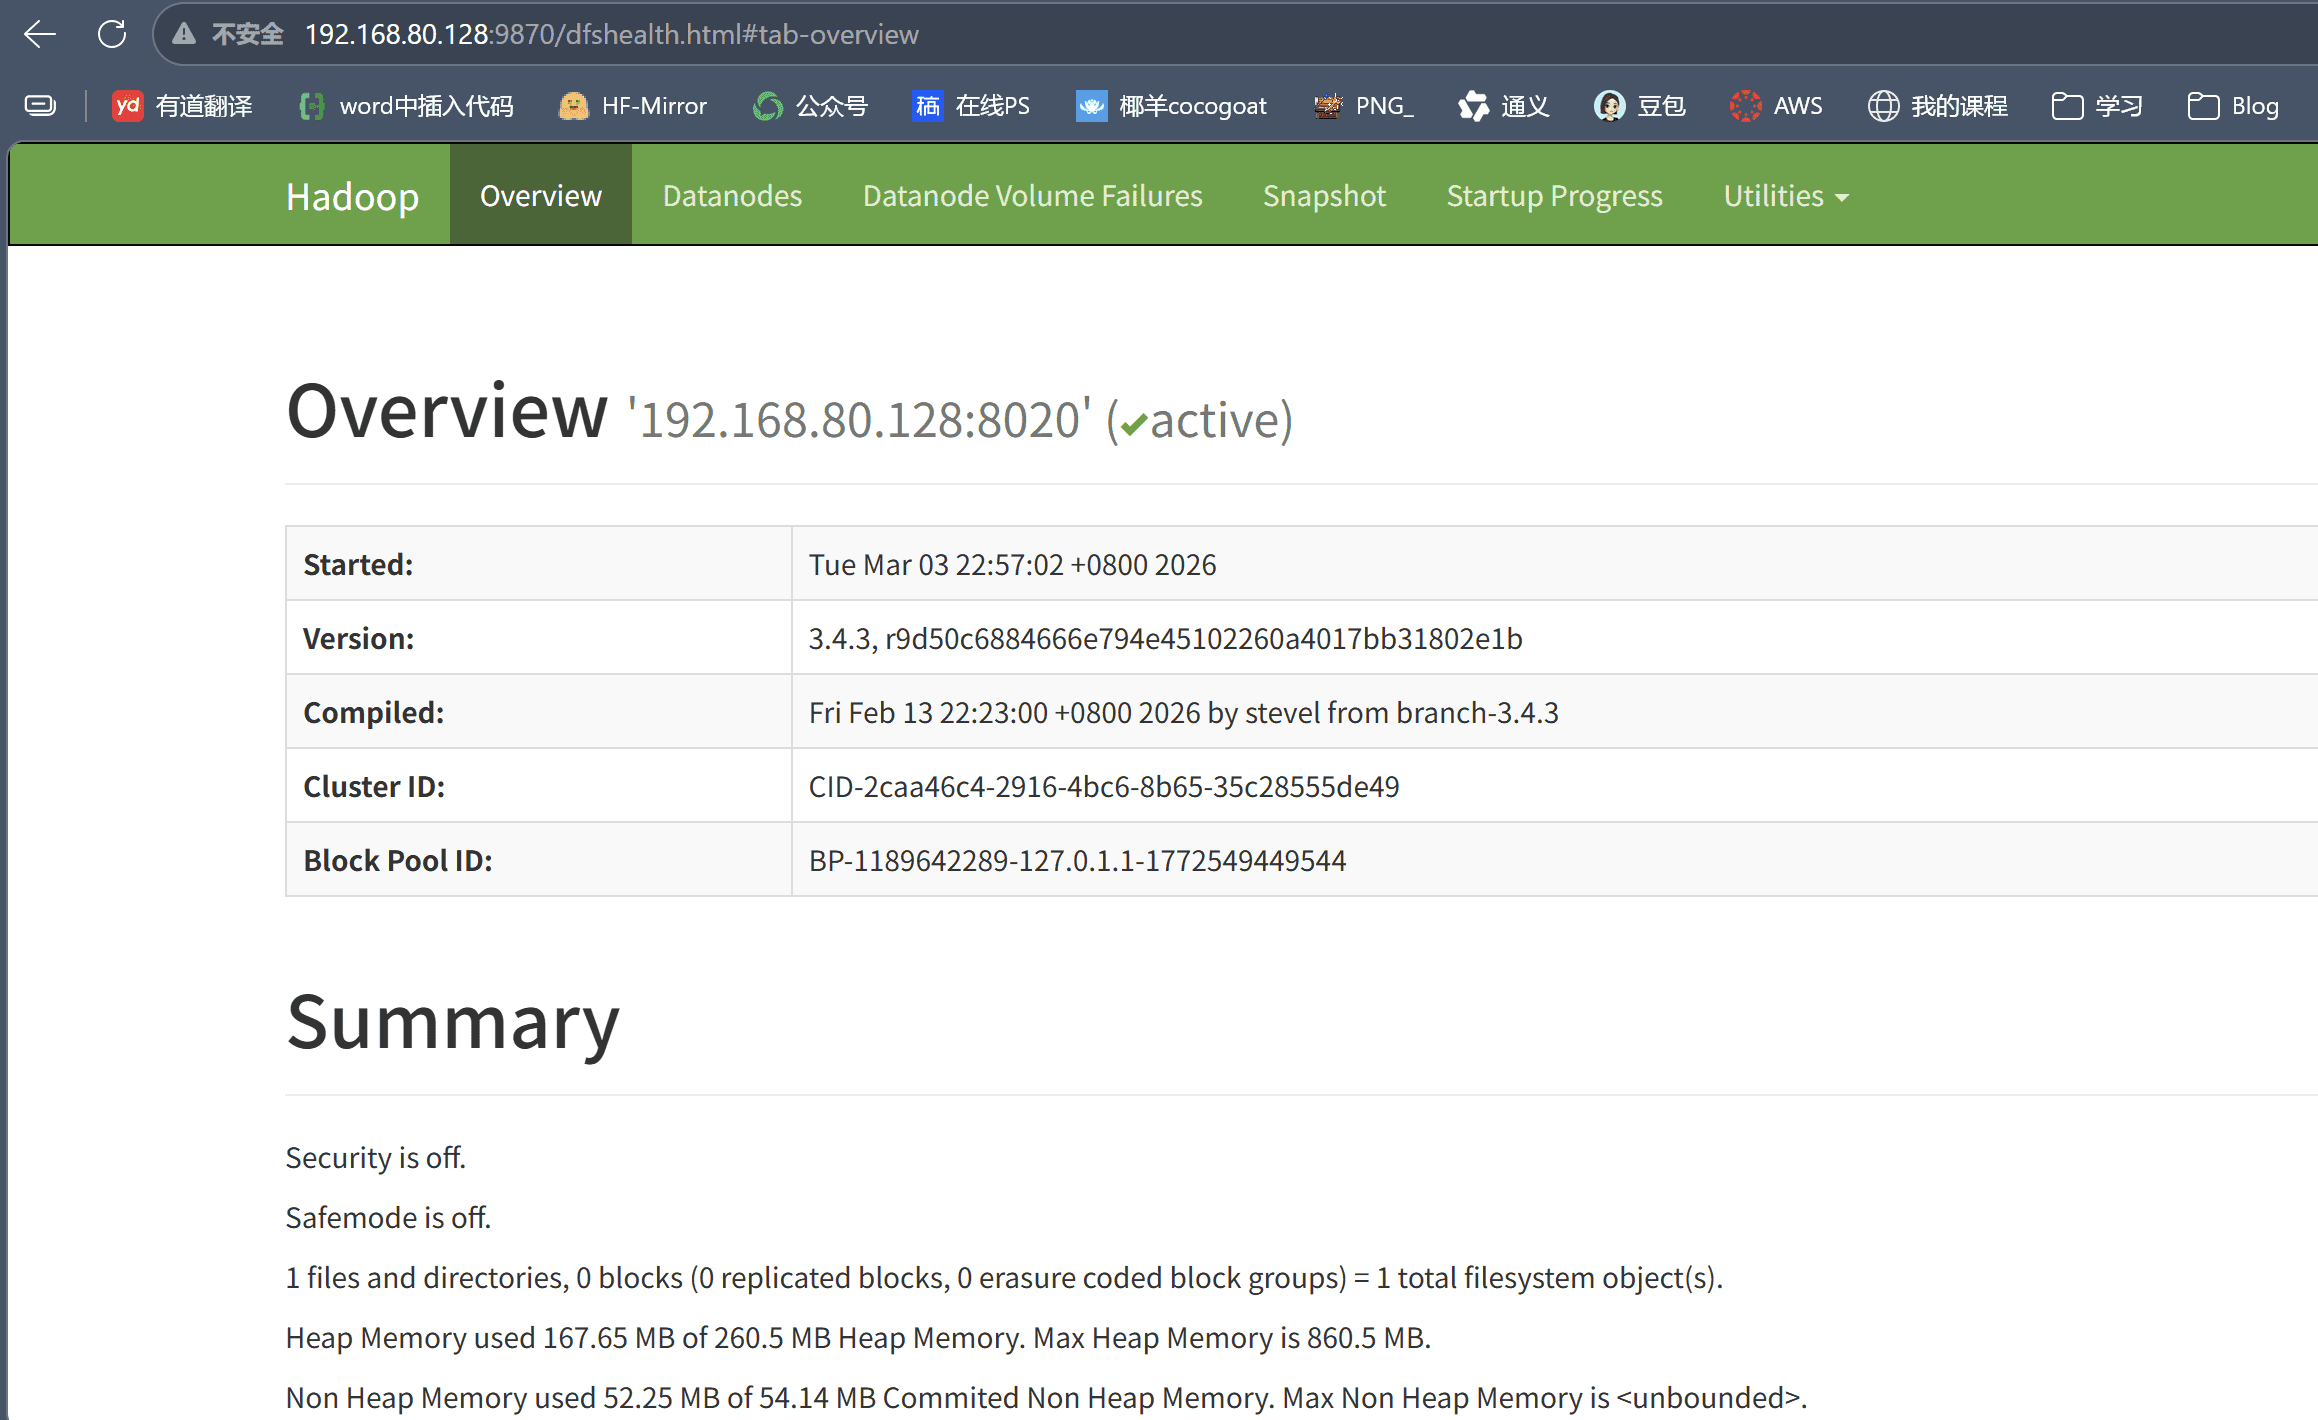
Test connection
Starting Nodes Individually
The above starts all nodes, but you can also start nodes individually. To start a node individually, use hdfs --deamon start|status|stop namenode on the corresponding node to start / check status / stop the namenode; changing the preceding namenode to datanode lets you start / check status / stop the datanode.